不知名的程序员

  • 首页

  • 关于

  • 标签

  • 分类

  • 归档

centos7简单安装配置Lamp

发表于 2019-08-21 分类于 Linux

1.安装apache

1.1[root@localhost ~]# yum install httpd

根据提示,输入Y安装即可成功安装

1.2 systemctl start httpd.service #启动apache

systemctl stop httpd.service    #停止apache

systemctl restart httpd.service #重启apache

systemctl enable httpd.service  #设置apache开机启动

centos7修改具体的apache配置 在etc/httpd/conf/httpd.conf目录下,

2.安装mariadb(MySQL)操作和mysql一样

 yum install mariadb mariadb-server  #安装mariadb

询问是否要安装,输入Y即可自动安装,直到安装完成

systemctl start mariadb.service #启动MariaDB,

systemctl stop mariadb.service    #停止MariaDB

systemctl restart mariadb.service #重启MariaDB,

systemctl enable mariadb.service  #设置开机启动

3 如果需要安装mysql需要去官网下载

3.1.下载 wget http://dev.mysql.com/get/mysql-community-release-el7-5.noarch.rpm

3.2.rpm 安装 mysql 相应的 yum源:    rpm -uvh mysql-community-release-el7-5.noarch.rpm

3.3.安装mysql yum install mysql-community-server

3.4.成功安装之后重启mysql服务 service mysqld restart

3.5 mysql -u root -p 进入mysql 默认密码为空

3.6 mysql> set password for ‘root’@‘localhost’ = password(‘mypasswd’);

    mysql> exit  搞定!

  (修改密码时可能会报错:Error (1133): Can’t find any matching row in the user table)

   在mysql命令行中执行 FLUSH PRIVILEGES  //刷新

grant all on *.* to root identified by 'root';  //远程连接语句

4.安装Php(由于yum自带的php包版本过低,可选择删除重新安装)

4.1.删除旧版本 yum remove php* php-common

4.2.rpm 安装 Php7 相应的 yum源:rpm -Uvh https://mirror.webtatic.com/yum/el7/webtatic-release.rpm

提示错误:

error: Failed dependencies:

epel-release >= 7 is needed by webtatic-release-7-3.noarch

需要先安装epel-release。

1.安装epel-release

通过命令:

yum -y install epel-release

成功安装。

4.3.安装phpyum install php70w

4.4.重启apache systemctl restart httpd.service

4.5.写一个php文件 vi /var/www/html/info.php

4.6 输入本机IP/info.php,显示phpinfo信息,至此apache,php OK了

php常用模块(php70w-fpm nginx解析php的容器)这里安装了 后面安装nignx时 直接调用就可以了

yum -y install php70w-devel php70w.x86_64php70w-cli.x86_64php70w-common.x86_64php70w-gd.x86_64php70w-ldap.x86_64php70w-mbstring.x86_64php70w-mcrypt.x86_64php70w-pdo.x86_64php70w-mysqlnd php70w-fpm php70w-opcache php70w-pecl-redis php70w-pecl-mongo

安装常用模块

5,安装nginx和php-fpm

yum install -y nginx

#设置nginx开机启动

 systemctl enable nginx

 #设置php-fpm开机启动

    systemctl enable php-fpm

提示:

1,之前自己安装的时候没有注意php的版本,apache安装成功了但是却不能解析php文件后面发现apache里没有加载php_module,

可以使用httpd-M检查是否安装,有则代表安装过。然后安装php7安装的时候自动就加上了,可能是版本过低的原因吧~~

2,如果是阿里云服务器有可能你的数据库一直连接不上,这时你应该检查下你阿里云服务器的安全组接口是否开启,3306这个端口是否添加到安全组规则里

3,yum install –enablerepo=remi –enablerepo=remi-php56 php-fpm 安装php-fpm 进程管理器

4,如果安装好了 环境 执行php文件 报403错误 看看nginx.conf配置文件里 有没有指定index.php

如 :location / {

# root  html;

index  index.html index.htm index.php;

}

5,如果安装完执行php文件 页面显示为空白的话打开php.ini的:

short_open_tag = On

6,如果防火墙开启的记得把端口加入到防火墙列表列如:

把 httpd 80端口加入到防火墙

firewall-cmd –zone=public –add-port=80/tcp –permanent

–zone : 在什么域添加

–add-port:添加的端口号

–permanent:永久添加模式

参考文章:
https://segmentfault.com/a/1190000009012613

http://www.cnblogs.com/rrrena/p/7228826.html

git提交前检查PHP语法错误和代码风格

发表于 2019-08-20 更新于 2019-12-07 分类于 Git
1
2
3
4
5
6
7
8
9
10
11
12
13
14
15
16
17
18
19
20
21
22
23
24
25
26
27
28
29
30
31
32
33
34
35
36
37
38
39
40
41
42
43
44
45
46
47
48
49
50
51
#!/bin/bash
#
PROJECT=$(git rev-parse --show-toplevel)
cd $PROJECT
SFILES=$(git diff --cached --name-only --diff-filter=ACMR HEAD | grep \\.php)
TMP_DIR=$PROJECT."/tmp"

# Determine if a file list is passed
if [ "$#" -ne 0 ]
then
exit 0
fi
echo "Check for PHP syntax errors..."
for FILE in $SFILES
do
# 检测PHP有没有语法错误
php -l -d display_errors=0 $FILE
if [ $? != 0 ]
then
echo "Fix the PHP syntax errors before commit."
exit 1
fi
FILES="$FILES $PROJECT/$FILE"
done

if [ "$FILES" != "" ]
then
echo "Check code style..."

#创建一个临时目录
TMP_DIR=/tmp2
mkdir -p $TMP_DIR
for FILE in $SFILES
do
mkdir -p $TMP_DIR/$(dirname $FILE)
#把文件保存到临时目录
git show :$FILE > $TMP_DIR/$FILE
done
#检查提交的文件
phpcs --standard=PSR2 --encoding=utf-8 -n $TMP_DIR
PHPCS_ERROR=$?
#删除该临时目录
rm -rf $TMP_DIR
if [ $PHPCS_ERROR != 0 ]
then
echo "Fix the code style errors before commit."
exit 1
fi
fi

exit $?

.gitignore和excludes的区别

发表于 2019-08-20 更新于 2019-08-21 分类于 Git

一、关于.gitignore 和 excludes
这两个文件的只针对尚未提交到配置库的文件才起作用。而对于已经提交的文件是不起作用的。
由此可见,这两个文件的初衷是用于排除不希望上传入库的文件。像编译产生的临时文件等。

但是,我们经常有这样一种情况。
有个文件,我们必须入库,大家一起共享,但是呢。每个人本地的配置又是因自己本地的环境而异。这样的话,这个文件就很崩溃了。你要入库,通过.gitignore和excludes都不起作用。每次git status都会提示你修改,你又好上传。

对于这种情况,应该使用下面的命令:

1
git update-index --assume-unchanged FILENAME

这样,每个人,从库上取代码后,在自己本地都要执行一下上面的这个命令。这样,以后,你这个文件的修改,git 都会帮你忽略掉。

当然,哪一天,你希望你的修改要提交入库,那你也必须手动修改一下 这个文件的标志位:

1
git update-index --no-assume-unchanged FILENAME

update方法使用集合

发表于 2019-08-16 分类于 Mysql

update应该是mysql里最常用的sql之一了,在开发过程中总结了以下几种写法

1,简单类型

1
2
3
4
语句结构
update table set where
示例:
update product SET order_count = 2 WHERE id = 1

2,多表类型

1
2
3
4
语句结构
update table1,table2 set table1.col = table2.col where
示例:
update product as p,`order` as o SET p.id = o.product_id WHERE id = 1

3,子查询类型

1
2
3
4
5
6
7
8
     语句结构
update table1,(select * from table) a set table1.col = a.col
示例:
UPDATE product as p,
( SELECT count( order_id ) AS order_count FROM `order` WHERE product_id = 1 ) AS o
SET p.order_count = o.order_count
WHERE
id = 1

取出分组后最新的一条数据的坑

发表于 2019-08-14 分类于 Mysql

今天群里有个小伙伴提了个需求说帮写一条取出分组后最新的一条数据的sql:

1
2
3
4
5
6
7
8
9
10
11
12
一开始我直接就上sql:
select * from (select * from a order by a.id desc) t group by id
结果找到的数据老不对,后面查阅资源发现,在mysql5.7后 优化器默认过滤了查询的order by 效果,
所以找到的数据不对劲,但是sql变成:
select * from (select * from a order by a.id desc limit 9999) t group by id
却又可以了。


后来只能用另外一种方法解决了,子查询加inner join 示例:
select * from product INNER JOIN
(select max(id) max_id from product group by price) as t
on t.max_id = product.id order by id desc

最后问题解决~~

下载文件之Header方式下载

发表于 2019-08-13 分类于 PHP
1
2
3
4
5
6
7
8
9
10
11
12
13
14
15
16
17
18
19
20
21
22
23
24
25
26
27
28
29
30
/**
* @param string $filePath 文件下载
*
* @throws \Exception
*/
public function fileDownload($filePath)
{
if (file_exists($filePath) == false) {
throw new \Exception('文件不存在');
}

$filename = basename($filePath); //获取文件名
header("Content-type: application/octet-stream"); //告诉浏览器这是一个文件流

//处理中文文件名
$ua = $_SERVER["HTTP_USER_AGENT"];
$encoded_filename = rawurlencode($filename);
if (preg_match("/MSIE/", $ua)) {
header('Content-Disposition: attachment; filename="' . $encoded_filename . '"');
} else {
if (preg_match("/Firefox/", $ua)) {
header("Content-Disposition: attachment; filename*=\"utf8''" . $filename . '"');
} else {
header('Content-Disposition: attachment; filename="' . $filename . '"');
}
}
readfile($filePath);//将缓冲区的数据写入表格
//让Xsendfile发送文件
/// header("X-Sendfile: $filePath");
}

header头参数详解:
https://en.wikipedia.org/wiki/List_of_HTTP_header_fields
Xsendfile和readfile区别:
http://www.laruence.com/2012/05/02/2613.html

window自动开启redis服务

发表于 2019-08-13 更新于 2019-08-26 分类于 Redis

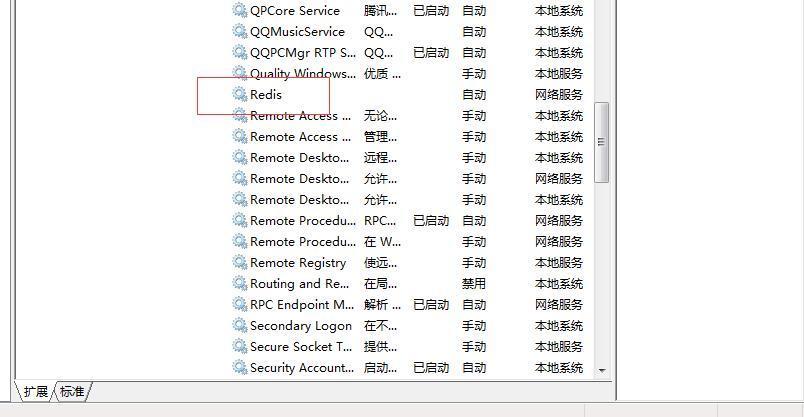
1,检查服务是否开启

位置:控制面板\所有控制面板项\管理工具\服务

hexo image

如果没有发现redis则代表 redis服务没有开启。

2,开启redis服务

redis-server --service-install redis.windows-service.conf --loglevel verbose

hexo image

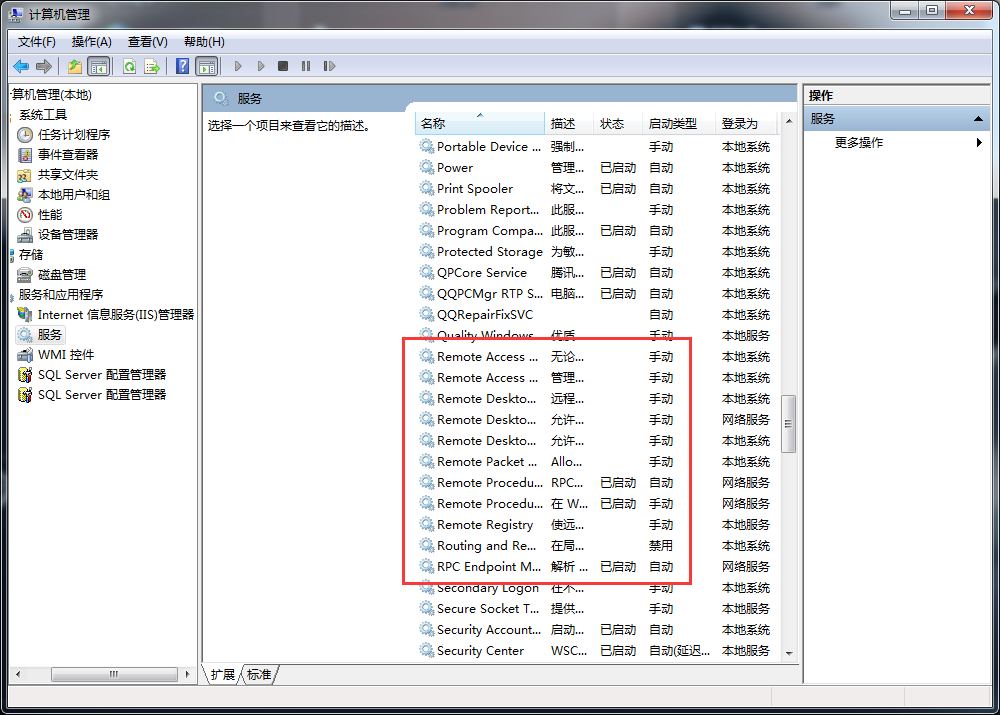
3,查看服务是否开启成功
hexo image

大功告成。

常用命令:

卸载服务:redis-server --service-uninstall

开启服务:redis-server --service-start

停止服务:redis-server --service-stop

参考:https://blog.csdn.net/blick__winkel/article/details/77986481

POSTMAN传递X-XSRF-TOKEN问题

发表于 2019-08-13 更新于 2019-09-19 分类于 PostMan

当用PostMan去提交post请求时,laravel(luemn)框架会有XSRF的验证,目的在使用PostMan通过XSRF的验证,用于测试POST的请求。以Laravel为例,Laravel会于回应浏览器的GET请求时将XSRF-TOKEN写在cookie中,因此本篇将示范如何从cookie中取得XSRF-TOKEN并附在POST的头部传递出去

一,安装chrome的扩充功能

PostMan透过chrome为拦截器(Interceptor)来记录的cookie,因此要先安装PostMan在chrome的扩展。

网址:https://chrome.google.com/webstore/detail/postman-interceptor/aicmkgpgakddgnaphhhpliifpcfhicfo

二,在postMan扩展安装好后,新增一个开发环境
2.1 在postMan的右上角有个环境设置的选项
hexo image
hexo image
hexo image

三,设置完之后选择刚刚建立的环境,然后执行一个get请求获取cookie
hexo image
3.1,把这段代码放入tests里

1
2
3
4
pm.environment.set(
"XSRF-TOKEN",
decodeURIComponent(pm.cookies.get("XSRF-TOKEN"))
)

hexo image

3.2,执行一个get请求查看下刚刚设置的环境,这是会有以下效果
hexo image

3.3设置X-XSRF-TOKEN
hexo image

3.4,执行一个post请求,完美执行成功
hexo image

关于PHP的flush和ob_flush的机制测试

发表于 2019-08-13 分类于 PHP
1
2
php正常的一个输出过高需要经历的阶段:
echo/print -> php buffer -> tcp buffer -> browser

一,buffer —- flush()

buffer是一个内存地址空间,Linux系统默认大小一般为4096(1kb),即一个内存页。主要用于存储速度不同步的设备或者优先级不同的 设备之间传办理数据的区域。通过buffer,可以使进程这间的相互等待变少。这里说一个通俗一点的例子,你打开文本编辑器编辑一个文件的时候,你每输入 一个字符,操作系统并不会立即把这个字符直接写入到磁盘,而是先写入到buffer,当写满了一个buffer的时候,才会把buffer中的数据写入磁 盘,当然当调用内核函数flush()的时候,强制要求把buffer中的脏数据写回磁盘。
同样的道理,当执行echo,print的时候,输出并没有立即通过tcp传给客户端浏览器显示, 而是将数据写入php buffer。php output_buffering机制,意味在tcp buffer之前,建立了一新的队列,数据必须经过该队列。当一个php buffer写满的时候,脚本进程会将php buffer中的输出数据交给系统内核交由tcp传给浏览器显示。

二,php output_buffering — ob_flush()

默认情况下,php buffer是开启的,而且该buffer默认值是4096,即1kb。你可以通过在php.ini配置文件中找到output_buffering配置.当echo,print等输出用户数据的时候,输出数据都会写入到php output_buffering中,直到output_buffering写满,会将这些数据通过tcp传送给浏览器显示。你也可以通过 ob_start()手动激活php output_buffering机制,使得即便输出超过了1kb数据,也不真的把数据交给tcp传给浏览器,因为ob_start()将php buffer空间设置到了足够大 。只有直到脚本结束,或者调用ob_end_flush函数,才会把数据发送给客户端浏览器。

这两个函数的使用怕是很多人最迷惑的一个问题,手册上对两个函数的解释也语焉不详,没有明确的指出它们的区别,似乎二者的功能都是刷新输出缓存。但在我们文章一开始的代码中如果讲fush()替换成ob_flush(),程序就再不能正确执行了。显然,它们是有区别的,否则也手册中直接说明其中一个是另外一个函数的别名即可了,没必要分别说明。那么它们的区别到底是什么呢?

在没有开启缓存时,脚本输出的内容都在服务器端处于等待输出的状态 ,flush()可以将等待输出的内容立即发送到客户端。

开启缓存后,脚本输出的内容存入了输出缓存中 ,这时没有处于等待输出状态的内容,你直接使用flush()不会向客户端发出任何内容。而 ob_flush()的作用就是将本来存在输出缓存中的内容取出来,设置为等待输出状态,但不会直接发送到客户端 ,这时你就需要先使用 ob_flush()再使用flush(),客户端才能立即获得脚本的输出。

三,测试
3.1,output_buffering=4096,输出较少的数据(少于一个buffer)

1
2
3
4
5
6
<?php
for($i=0; $i<10; $i++){
echo $i.'<br>';
sleep(1);
}
运行结果:等所有脚本全部运行完成后,才输出,因为数据未满一个buffer的大小。

3.2.output_buffering=4096,输出较少的数据(少于一个buffer),关闭output_buffering,修改php.ini的output_buffering=0

1
2
3
4
5
6
7
<?php
for($i=0; $i<10; $i++){
echo $i.str_repeat("&nbsp;",1000).'<br>'; // 为了浏览器能够显示
flush();
sleep(1);
}
运行结果:因为禁用了php buffering,不需要等到脚本运行完毕就可以输出,数据没有在php buffer停留,可以看到断断续续间歇性输出。echo -> tcp buffer ->browser

参考博文:
https://blog.csdn.net/fdipzone/article/details/10367837
http://www.laruence.com/2010/04/15/1414.html
https://www.cnblogs.com/zhangyuhang3/p/6873502.html
http://niliu.me/articles/605.html#comment-2983

hexo+gitPage简单的搭建实战

发表于 2019-08-02

###一,Hexo安装:

1.1,在命令行中通过 npm 来安装 Hexo:

npm install -g hexo-cli
-g 表示全局安装,会将 Hexo 命令加入环境变量中,以使其在 cmd 下有效。
Hexo 依赖于 [Node.js](https://nodejs.org/zh-cn/) 和 [git](https://git-scm.com/download/),所以在安装 Hexo 之前先确保已安装了这两项应用。

1.2,根目录下执行初始化命令:

hexo init

1.3,执行完毕:

  .
├── node_modules       //依赖安装目录
├── scaffolds          //模板文件夹,新建的文章将会从此目录下的文件中继承格式
|   ├── draft.md         //草稿模板
|   ├── page.md          //页面模板
|   └── post.md          //文章模板
├── source             //资源文件夹,用于放置图片、数据、文章等资源
|   └── _posts           //文章目录
├── themes             //主题文件夹
|   └── landscape        //默认主题
├── .gitignore         //指定不纳入git版本控制的文件
├── _config.yml        //站点配置文件
├── db.json            
├── package.json
└── package-lock.json

1.4,开启服务:

hexo server
hexo 服务器默认监听 4000 端口,用户可在浏览器中通过地址 localhost:4000 访问博客。

1.5,浏览器访问

localhost:4000
会将网站正常加载出来

###二,gitpage页面搭建

2.1,创建一个项目例如

leiyuanpu.github.io  //库名为自己的账号,等会这个就是我们访问的连接

2.2,点击项目的setting->设置GitHub Pages

选项1:Source  //将master设置为站点的分支
选项2:Theme Chooser  //选择主题 

2.3,浏览器访问

如以上没有报错直接访问:leiyuanpu.github.io将会显示出一个完整的页面出来。

###三,建hexo部署到git
3.1 将hexo部署到git,并通过gitpage页面展示出来

在hexo项目里安装
npm install hexo-deployer-git --save

3.2 在根目录的_config.yml中设置:

deploy:
    type: git
    repo: git@github.com:leiyuanpu/leiyuanpu.github.io.git  //ssh模式
    branch : master //master分支

3.3 设置免密码推送参考
https://www.jianshu.com/writer#/notebooks/21583544/notes/43946245/preview

3.4 基础命令

hexo  clean  清除快取档案( db.json)和已产生的静态档案( public)。
hexo  generate 产生静态档案。
hexo  deploy  部署网站。
hexo help 会列出所有的命令

自己搭的效果示例:https://leiyuanpu.github.io/

参考博客:
http://yearito.cn
https://linlif.github.io/

1234

LYP

31 日志
12 分类
13 标签
© 2020 LYP
|